
How to Replace Trim Kits on the 4003 & 4004 Streetlight Fixture
Part 1 - Disassembly:
- First, remove the finial from the top of the fixture. It unscrews by hand.
- Slide the globe topper off the bolt used to secure the finial.
- Next, remove the screws that secure the bolt mount to the top of the fixture. Then detach the bolt mount from the fixture.
- Now, remove the screws securing the crown to the four (4) vertical lattice supports.
- Set the crown (topper) aside in a safe spot.
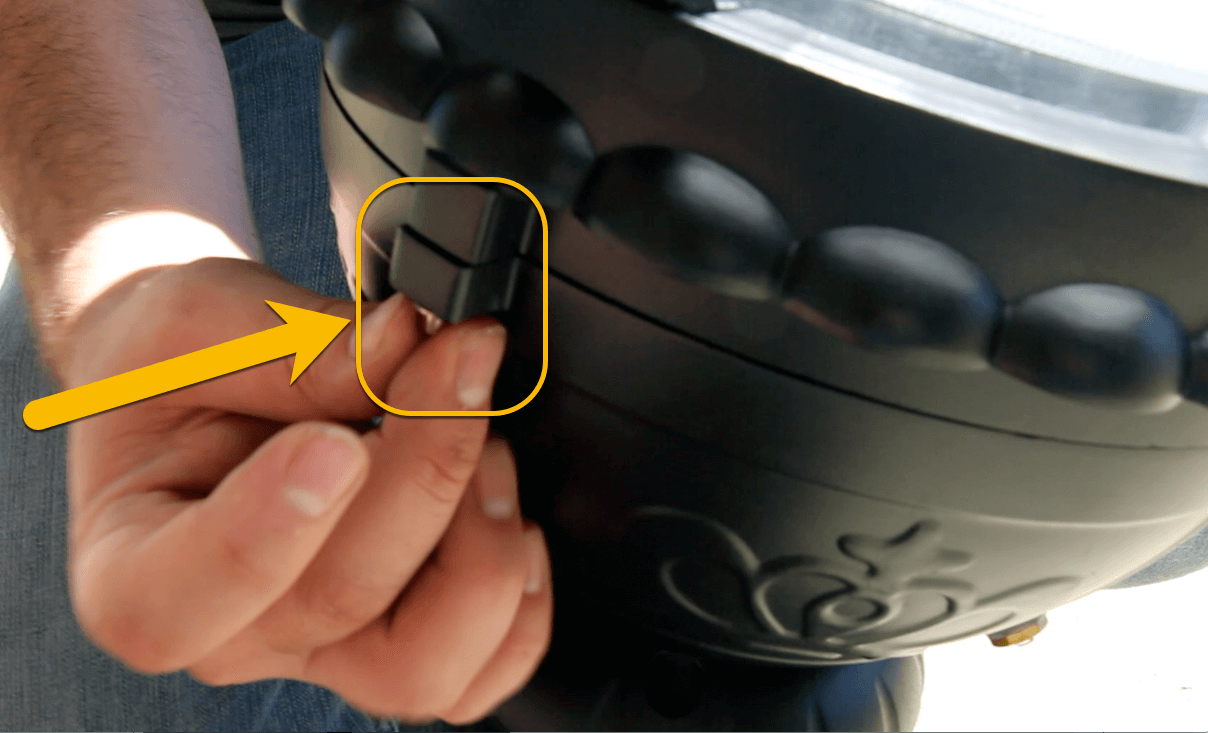
- Using the L wrench provided, unscrew the fixture hinge (not shown in video).
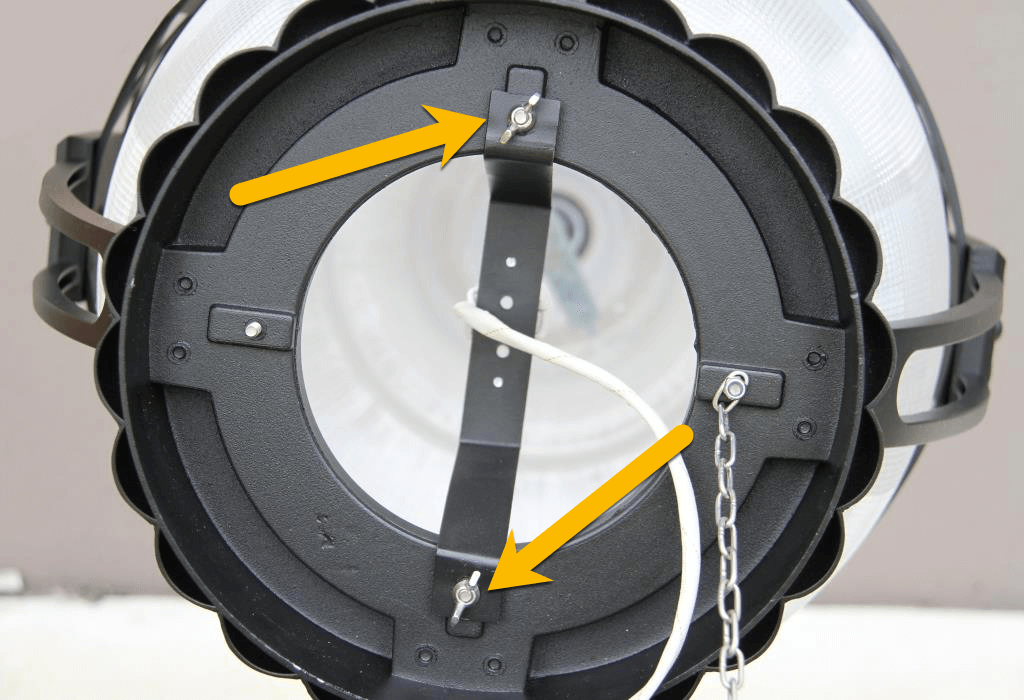
- With the fixture-top open and separated from the fixture-base, remove the nut securing the chain to the fixture-base.
- Remove the bulb socket mount by removing the two screws that attach it to the fixture. a. Important: remove the wingnuts before attempting to unscrew the bulb socket mount from above (not shown in video).
- Place nuts and washers in a safe spot, where they won?t get lost.
- Now, return the fixture to its original closed position.
- Inside the globe, you can remove the screws that secure the globe to the fixture.
- Remove the globe and set aside in a safe spot.
- Remove the screws that secure the lattice trim to the four (4) vertical lattice supports. Remove the lattice trim and set aside in a safe spot. Save the screws, as you will need them for re-assembling the fixture.
Part 2 - Reassembly:
- Now, attach the replacement lattice trim to the four (4) vertical lattice supports. You will need the same screws you removed in the previous step.
- Return the globe to the fixture.
- With the fixture open at the base, return the chain that attaches the fixture-top to the base. You may need to fasten the nut by tightening with a screwdriver from within the globe.
- Reattach the bulb socket mount to the fixture and secure the wingnuts.
- Secure the fixture-top to the fixture-base using the L wrench provided.
- Secure the globe to the fixture. You will need the original screws that you removed and set aside.
- Reattach the bolt mount to the top of the fixture.
- Secure the bolt.
- Slide your replacement globe topper over the bolt.
- Screw the replacement finial to the bolt by hand until secure.
Now that you?ve replaced your trim kit, check the fixture to make sure everything is secure. If you run into any snags along the way, feel free to give us a call.
Customers Who Trusted Got It Wholesale With Their Projects